Traveler’s Notebook Guide
How to setup and take care of the unique Japanese notebooks
What is the Traveler’s Notebook?
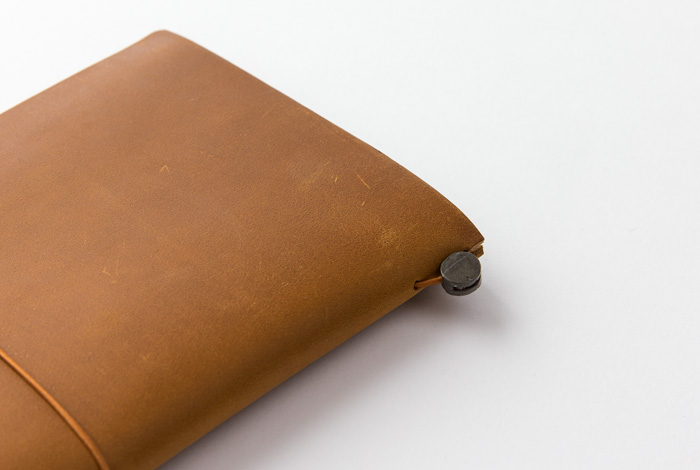
The Traveler’s Notebook by the Traveler’s Company is a very unique and fully customizable notebook. From a bigger scale though, the Traveler’s Notebook is a system of notebooks and accessories, that you will be your loyal companion for years to come!

The initial Traveler’s Notebook purchase comes with a thick piece of leather, two pieces of elastic, and a notebook. But that’s just the beginning, you will soon find out that there are dozens of accessories to customize your Traveler’s Notebook — refill notebooks, pocket stickers, card files, zip cases, pen loops, and paper folders can all be weaved into your unique piece of leather.
And like any analog tool these days, the worldwide community has fashioned after-market accessories as well. Need a weekly meal planning journal? A ledger refill? A map of Tokyo’s subway system? There is a whole community dedicated to the Traveler’s Notebook and it is brimming with inspiration on ways to make your notebook your own.
Basic Setup Guide
Keeping in mind the Traveler’s Notebook is a system of notebooks and rarely just a single notebook, there is some handy setup work involved. When you purchase the Traveler’s Notebook leather cover, it comes already with the essential items need to start writing. Simply attach the notebook under the rubber band (as shown below) and you’re good to go. However, the Traveler’s Notebook has been designed from the start to be fully customizable to your needs. There are many refills and accessories available, you make the notebook your own. The following a basic setup guide.
Choose your cover
Firstly, and most importantly, you get to choose a cover. There is two different sizes and four different color options each.
- Regular size — The perfect size for comfortable writing yet still handy enough to bring it wherever you go
- Passport size — Very compact notebook cover big enough to hold your passport while traveling


Choose your paper
Next, you choose your favorite paper and linetture for writing or drawing. Do you prefer blank paper, or perhaps lined? Soft and smooth paper for writing or think craft paper for drawing? There’s many choices available. Just make sure that you select the right size for your notebook.
Apart from that, there is also a variety of agendas and schedulers to choose from. Select a daily, weekly or monthly layout, some also available with grid lines for notes. Combine up to four notebooks without hassle and easily swap them out once they’re full.
Choose your accessories
Your notebook can further be customized with many different accessories, ranging from pocket stickers, card files, zip cases, pen loops, and paper folders. All of which make your notebook more versatile and unique.
Here’s some ideas:
- Use a zip case to keep a ruler, compass and eraser at hand
- Use a pen loop (in the matching color) to keep your favorite pen easily accessible
- Use the paper folders to keep flight tickets, passports or other important documents in place
- Use some pocket stickers for business cards, stamps or photos


Keeping it organized
If you’re a frequent writer, you will soon end up with a lot of full notebooks. Some of them contain valuable memories that you might want to keep. Traveling journals, personal diaries or an art collection. Keep all of you notebooks in the matching notebook binders and label them for an easy overview of your adventures and memories. One binder comfortably holds up to 5 notebooks.
Get creative
But it doesn’t stop there, once your notebook is fully equipped, it’s time to make it yours. Personalize the notebook with your favorite charm, add a sticker or even have your name engraved! There is much room for personality and creativity.
Here’s some ideas for your inspiration:
- Attach your favorite charm or a piece of leather on the rubber band
- Attach some stickers or pictures of your family to the cover, inside or outsideFor photos we recommend to use the pockets stickers, so that you can swap them out easily
- Have your name engraved at the local leather repair shop

Rediscover the magic world of handwriting with the Traveler’s Notebook
How to Setup Refills
There are several way to setup your Traveler’s Notebook with refills, follow this simple guide and find your preference.
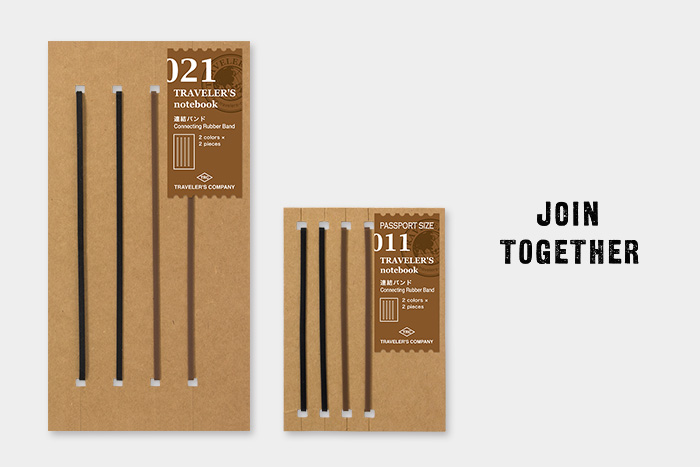
You can setup several refills to TRAVELER’S notebook with a Connecting Rubber Band (see image below) or setup
upto two traveler’s notebook refills using the concatenated band, attached to the leather cover.
Travelers’ Notes can be used more and more by combining multiple notes. Separate notes by schedule and notes, private and business, idea notes and diaries etc, select the optimal combination when necessary. If you use a connected band, you can set multiple note refills.
Combining different refills in your notebook for instance, join together a datebook and a scratch pad, two notebooks for private and business use, or a diary and a record of ideas. Choose different refills for different uses, and combine
connecting rubber band. Use the connecting rubber bands, as shown below.
Connecting two notebooks
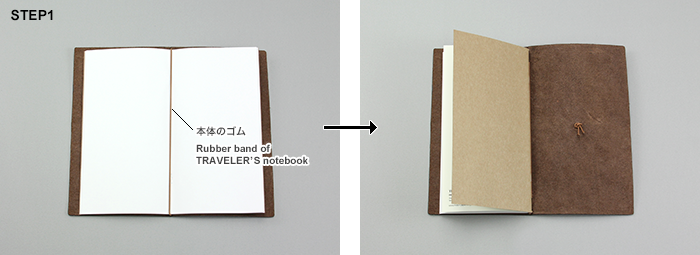
Step 1
Prepare one “connected band”. Pass the note refill through the rubber inside the leather cover.
Using one CONNECTING RUBBER BAND. Put a refill between the rubber band and cover.
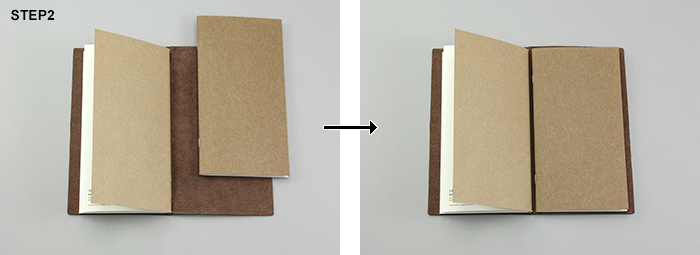
Step 2
Next to that, order the second note refill.
Set the connecting band to the refill.
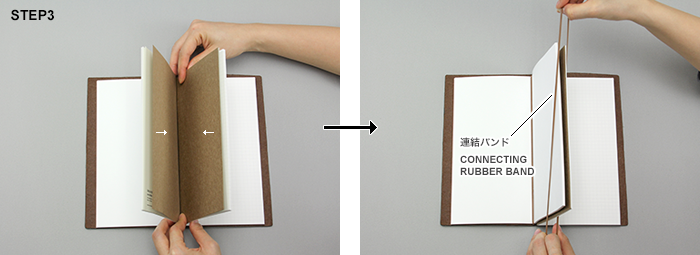
Step 3
Open each note refill at the center page, align the two books, and pass through the connected band.
Note: When setting or removing, the connection band may be broken due to friction with the end of the cover of the note refill. Do not slide, please use while stretching.
The Second Refill Pass Through The Connecting Band.
CAUTION:. The Connecting Rubber Band May Be Cut Off When You Set Refills By Sliding The Band To Prevent Cutting Off, Please Stretch A Rubber Band Well When You Set.
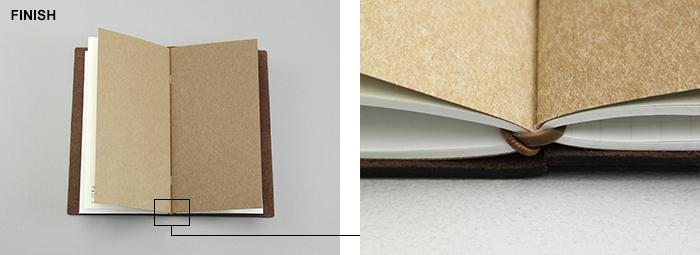
Finish
You’re all done.
Connecting three or more notebooks
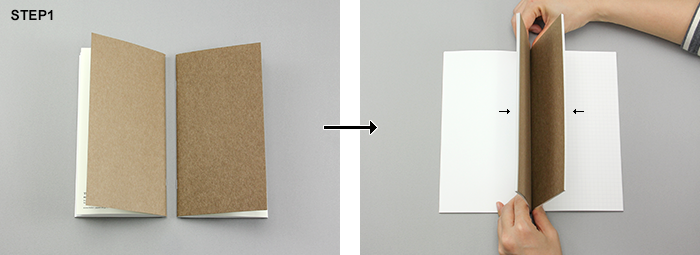
Step 1
Line up two refills of your choice. Open their central pages, and bring them together back-to-back.

Step 2
Put the refill through the connecting band.
CAUTION : The connecting rubber band may be cut off when you set refills by sliding the band. To prevent cutting off, please stretch a rubber band well when you set.
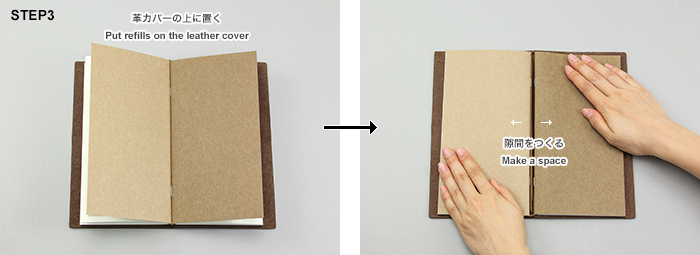
Step 3
Put them on the leather cover and pull the original rubber band out of the chink.
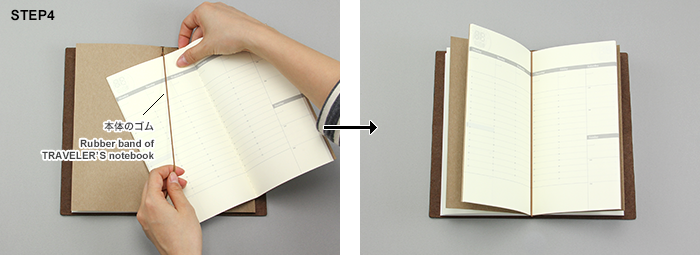
Step 4
Pass the third refill through the original band.
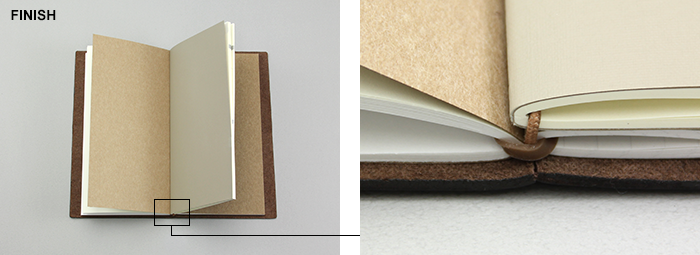
Finish
You’re all done.
Leather care and caution
With proper care, your Traveler’s Notebook might just be the last notebook you will ever need — a loyal companion for a lifetime.
If the leather gets wet or is rubbed a lot, the color may transfer to clothing or other items. If it gets wet, pat it with a soft cloth and let it dry in the shade. Avoid washing the entire notebook cover with water, and avoid use of benzene or thinners. For storage, make sure the cover is not wet or dirty, and store it in a ventilated area. Avoid storing it directly in contact with other leather items or vinyl items, as the color may transfer. To preserve the natural beauty of the leather, the surface is not heavily treated, and therefore may get scratched easily in the beginning. As the notebook cover is used more, it will develop a glaze, the beauty will be enhanced, and scratches will be less visible. Those who are concerned about scratches may apply mink oil, which deepens the color of the leather and makes scratches less conspicuous.